2026-09-19 · Mark Jensen
How to Flush Sediment from a Tank Water Heater in Weld County Homes
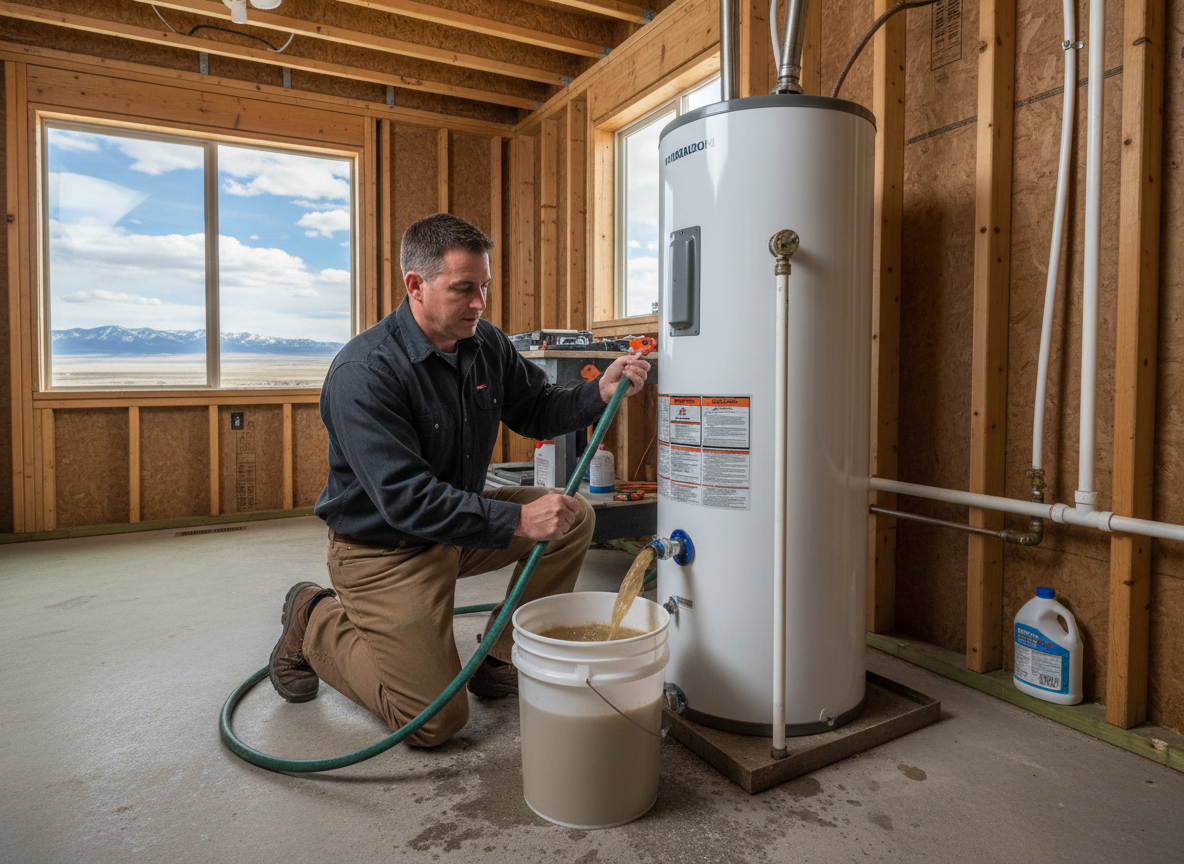
To flush sediment from a tank water heater in Weld County homes, you'll need to turn off the power/gas, shut off the cold water supply, connect a garden hose to the drain valve, open the drain valve, and then open a hot water faucet in your home to break the vacuum. The frequency of flushing depends on your water quality, but typically, an annual flush is recommended, or every 6 months if you notice signs of excessive sediment buildup like rumbling noises. This routine maintenance is especially important in areas like Johnstown and Milliken, where mineral content in the water can lead to significant accumulation over time, impacting your unit's performance and longevity. Ignoring this can lead to costly repairs or premature <a href="/services/water-heater-replacement">water heater replacement</a>.
Why Sediment Buildup is a Problem in Weld County
Weld County, including areas like Downtown Johnstown and the surrounding rural communities, often experiences hard water conditions. This means the water supplied to your home contains higher concentrations of minerals like calcium and magnesium. These minerals, when heated, precipitate out of the water and settle at the bottom of your water heater tank as sediment. Over time, this layer of sediment acts as an insulator, forcing your water heater to work harder and longer to heat the water. This increased workload not only drives up your energy bills but also accelerates wear and tear on the heating elements or burner, leading to reduced efficiency and a shorter lifespan for your unit. The semi-arid climate with hot summers can also contribute to higher water usage, potentially introducing more minerals into your system.
Signs Your Water Heater Needs Flushing
Recognizing the signs of sediment buildup early can save you from more significant problems down the line. One of the most common indicators is a rumbling or popping noise coming from your water heater. This sound occurs as water gets trapped and boils beneath the sediment layer. Another sign is a noticeable decrease in hot water availability or a <a href="/services/water-heater-not-hot-enough">water heater not heating</a> as efficiently as it used to. You might also observe cloudy or discolored hot water, especially when first turning on a faucet, which indicates sediment being stirred up and distributed. If your energy bills are unexpectedly higher without a change in usage, your water heater might be working overtime due to sediment insulation. For homes near St. Vrain State Park, where water sources can vary, these signs are particularly important to monitor.
Tools and Materials You'll Need
Before you begin, gather all the necessary tools to ensure a smooth and safe flushing process. You'll need a garden hose long enough to reach from your water heater to a suitable drainage point, like a floor drain or outside. A bucket can be useful for catching initial water or small spills. You might also want a pair of work gloves for protection and a flathead screwdriver or pliers if your drain valve requires it. For gas water heaters, locate the gas shut-off valve. For electric units, know the location of your circuit breaker panel. Having these items ready will prevent interruptions once you start the procedure. Remember, safety first, especially when working with gas or electricity.
Step-by-Step Flushing Procedure
1. Turn Off Power/Gas and Cold Water Supply: For an electric water heater, go to your home's electrical panel and switch off the circuit breaker labeled for the water heater. For a gas water heater, turn the gas valve to the "OFF" position. Next, locate the cold water inlet valve at the top of your water heater and turn it clockwise until it's completely closed. This stops new water from entering the tank. This is a critical first step to prevent scalding and ensure no water flows back into the tank during the flush.
2. Connect and Open the Drain Valve: Attach your garden hose to the drain valve located at the bottom of your water heater. Ensure the connection is secure to prevent leaks. Direct the other end of the hose to a safe drainage area, such as a floor drain, a utility sink, or outside away from foundations and landscaping. Once the hose is in place, open the drain valve, usually by turning a knob or handle counter-clockwise. You should hear water beginning to flow through the hose. This initial flow will primarily be hot water, so exercise caution.
3. Open a Hot Water Faucet: To help the water drain more efficiently and prevent a vacuum from forming, open a hot water faucet somewhere in your home. A bathtub faucet is ideal as it typically has good flow. You'll notice the water draining from the hose will become cooler as the tank empties. Let the water run until it comes out clear, indicating that most of the sediment has been flushed out. This might take 15-30 minutes, depending on the amount of sediment.
4. Flush with Cold Water (Optional but Recommended): Once the tank is mostly empty and the water runs clear, close the drain valve. Slowly open the cold water supply valve to allow fresh, cold water to enter the tank. Let it run for a few minutes, then close the cold water supply again and reopen the drain valve. This helps stir up and flush out any remaining stubborn sediment. Repeat this process until the water coming out of the hose is completely clear. This extra step is highly beneficial for older tanks or those with significant buildup.